Saturday, February 29, 2020
Editing Blog: Adding Titles
Friday, February 28, 2020
Editing Blog: Adding Transitions

Thursday, February 27, 2020
Editing Blog: First Scenes

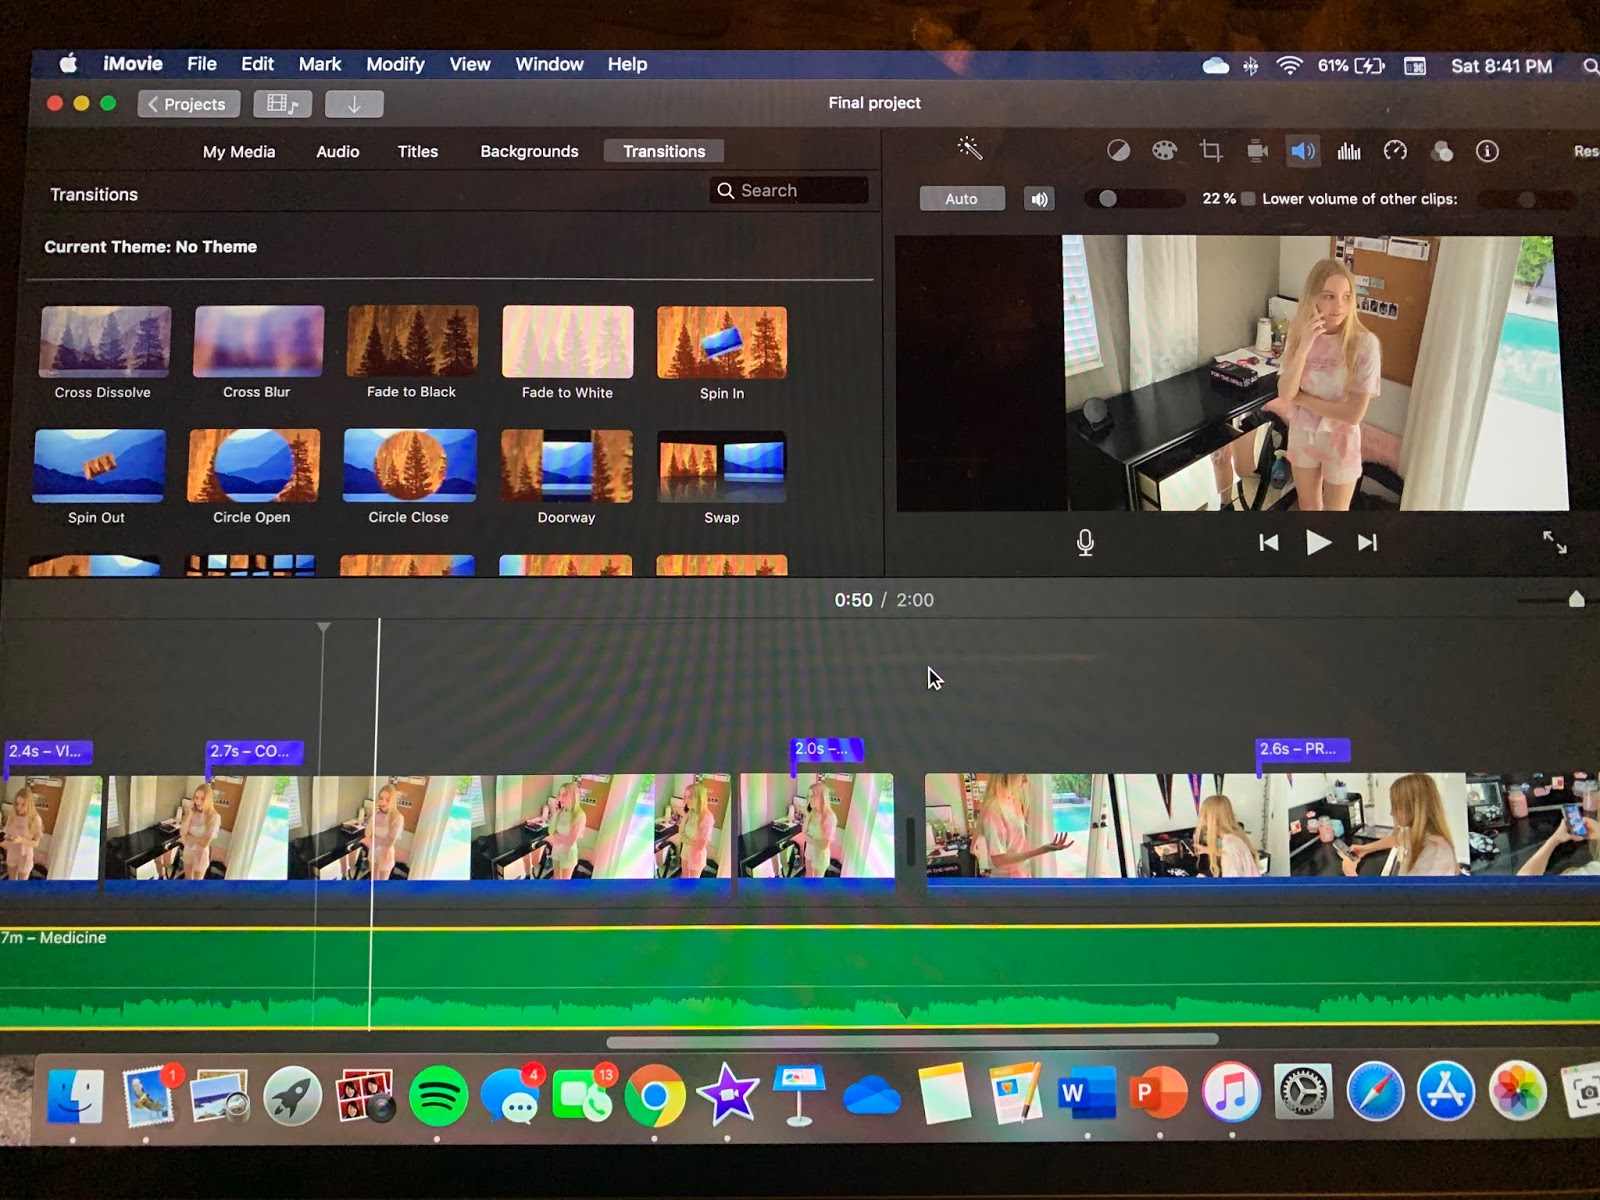
Today was the first day we began to edit. The first step was to get all the footage onto one device. So we emailed all of the footage from different devices to one email. We then imported all of this footage. The footage was put onto Kelsey's computer. We then had to select what editing software we would be using. We were between iMovie and Pinnacle Studios. We decided on iMovie as Kelsey's computer is a Mac. This has its advantages such as allowing us to be able to edit outside of school hours. If we used Pinnacle Studios we could only edit during school hours on school computers. So the final decision was to use the editing software iMovie. We began by selecting which clips would be used. We took multiple shots of each scene so we had to select which ones were the best. After reviewing the footage put together we realized some re shoots may be needed. We added transitions between scenes. After reviewing the edited footage some of the transitions were clunky. We changed the transitions and made them more smooth. After the editing process we added the titles. These titles showed the name of the movie and which group member had each role in the project. The next step in editing is adding more scenes and making sure the final product isn't clunky or confusing for the viewer.
Wednesday, February 26, 2020
Filming Blog: Night Scenes

Monday, February 24, 2020
Filming Blog: Day Scenes
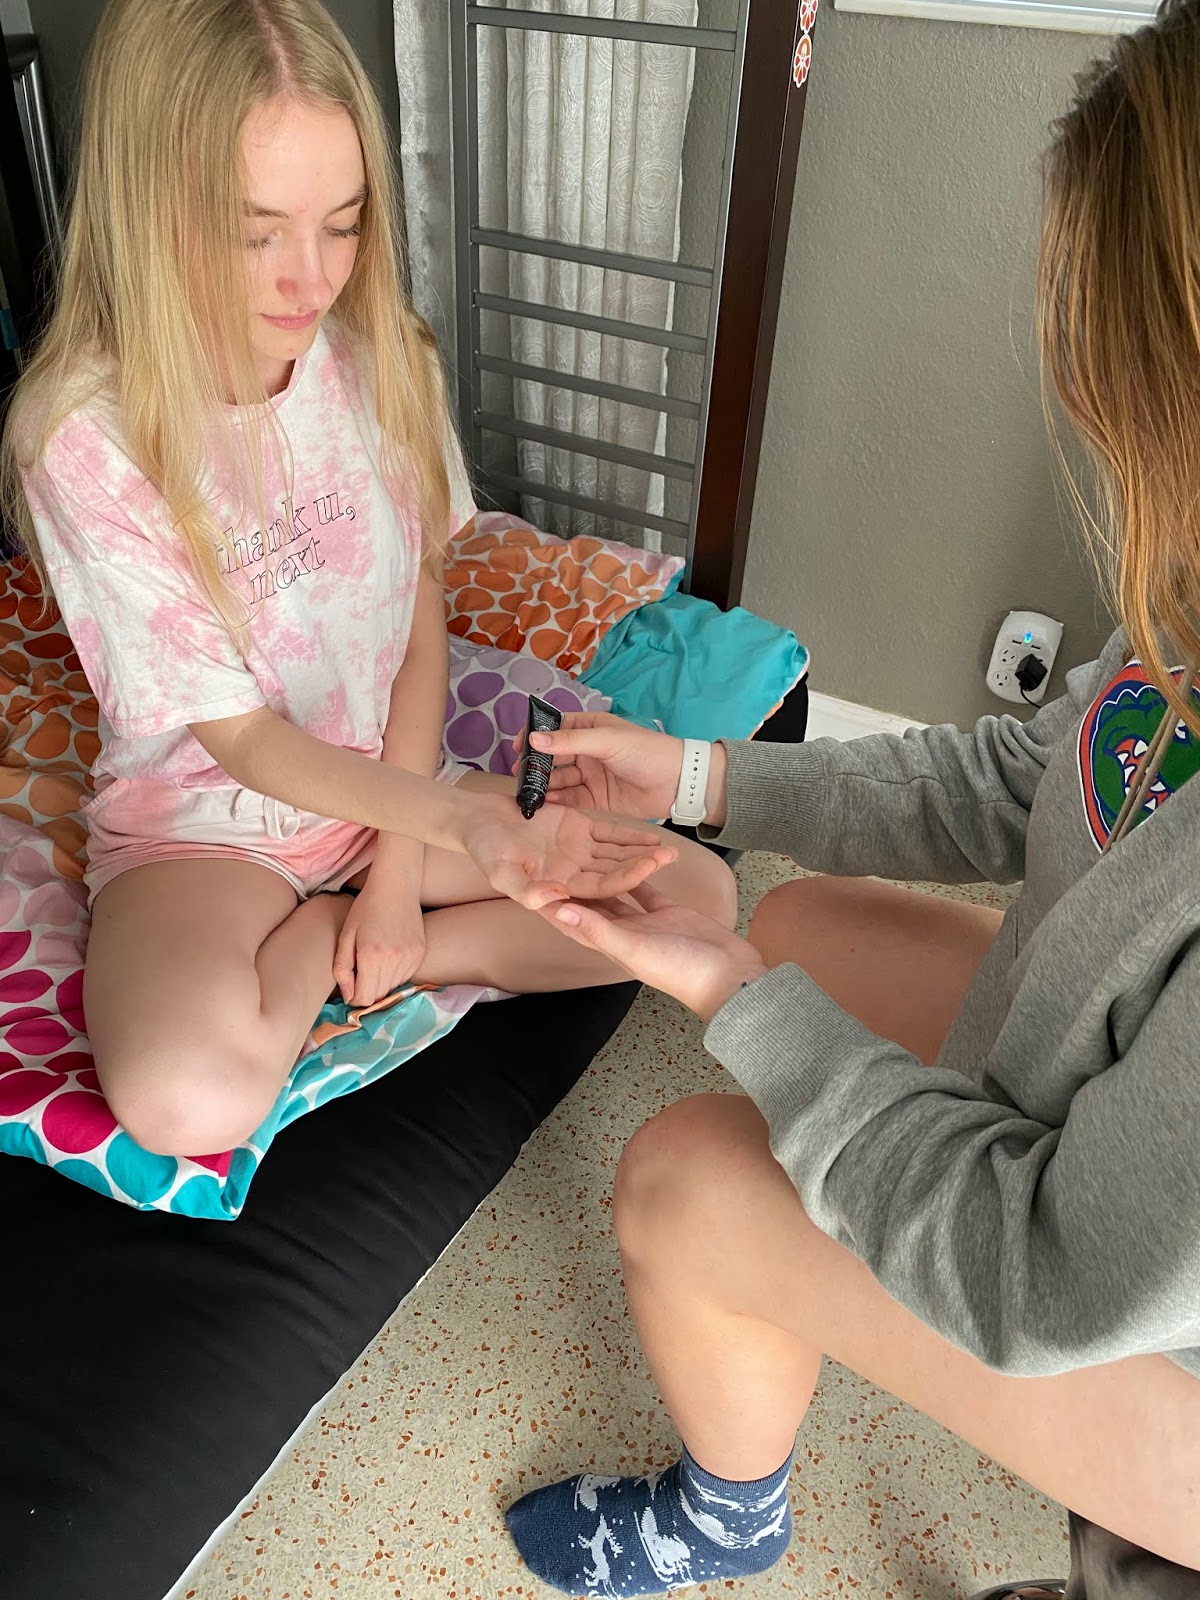
Today was the 2nd day of filming. Today we had to meet up right after school so that we had natural lighting. We met at Kelsey's house. The same place we filmed last time. We used fake blood to represent what might have happened to the character. The fake blood was put on Tekla's hand then rubbed in using a cotton swab till we got the desired look. We had to film four scenes today. The first scene was waking up and the main character realizing her friend isn't there. We used an eye level shot for this scene. The next scene was the knocking scene. We used tracking and eye level shots for this scene. Then we shot the scene where the main character was calling people and looking at pictures. We used high angle shot for this. In one scene we needed to take a high angle shot. So to do this we had Dominic our camera man climb up onto the top bunk of the bunk bed and aim down. And for a pan shot we placed the phone on a desk chair and rotated it to create a nice and clean pan shot. We also used the same desk chair to create a tracking shot. We reviewed all of our footage and have no issues with the quality. We are going to film within the next few days. But this time we will wait till later because these scenes are set at night.
Thursday, February 20, 2020
Fimling Blog: First Day
We begun our first day of filming today. We all met at Kelsey's house. The filming for today all took place in Kelsey's room. We met at about 4:00 pm and began shooting after preparing the set at about 4:15 pm. We set out to film the scenes that where we needed sunlight to film. We shot 3 seperate scenes. We shot every scene multiple times just incase there was a error in any of the scenes we could just replace them. And also many of these failed attempts at filming the scene may be used as bloopers. I was incharge of making sure the setting looked as it should. I was also incharge of lighting. And I had to get all the props we used. An example of me doing my job in the project was making sure the lighting was right to convey the correct mood for the scene. This mostly included opening windows, curtains, and opening doors. This helped us convey the correct mood for the scene such as a sad mood in the shot where Tekla was looking through her phone. In that scene I closed the curtains halfway to convey that it is still day time but to show a more somber mood. In the first scene I set up the bed to try to make the bed actually slept in. I also let Tekla use my phone in the scene where she was scrolling through looking at pictures of Kelsey. We finished filming at around 5:30. We then reviewed all of the footage. Then all of us departed from the place of filming. Next time we will be meeting at a later time because the next scenes take place at night.


Kelsey was behind the Camera in this picture
Thursday, February 13, 2020
Planning Blog: Storyboard


a


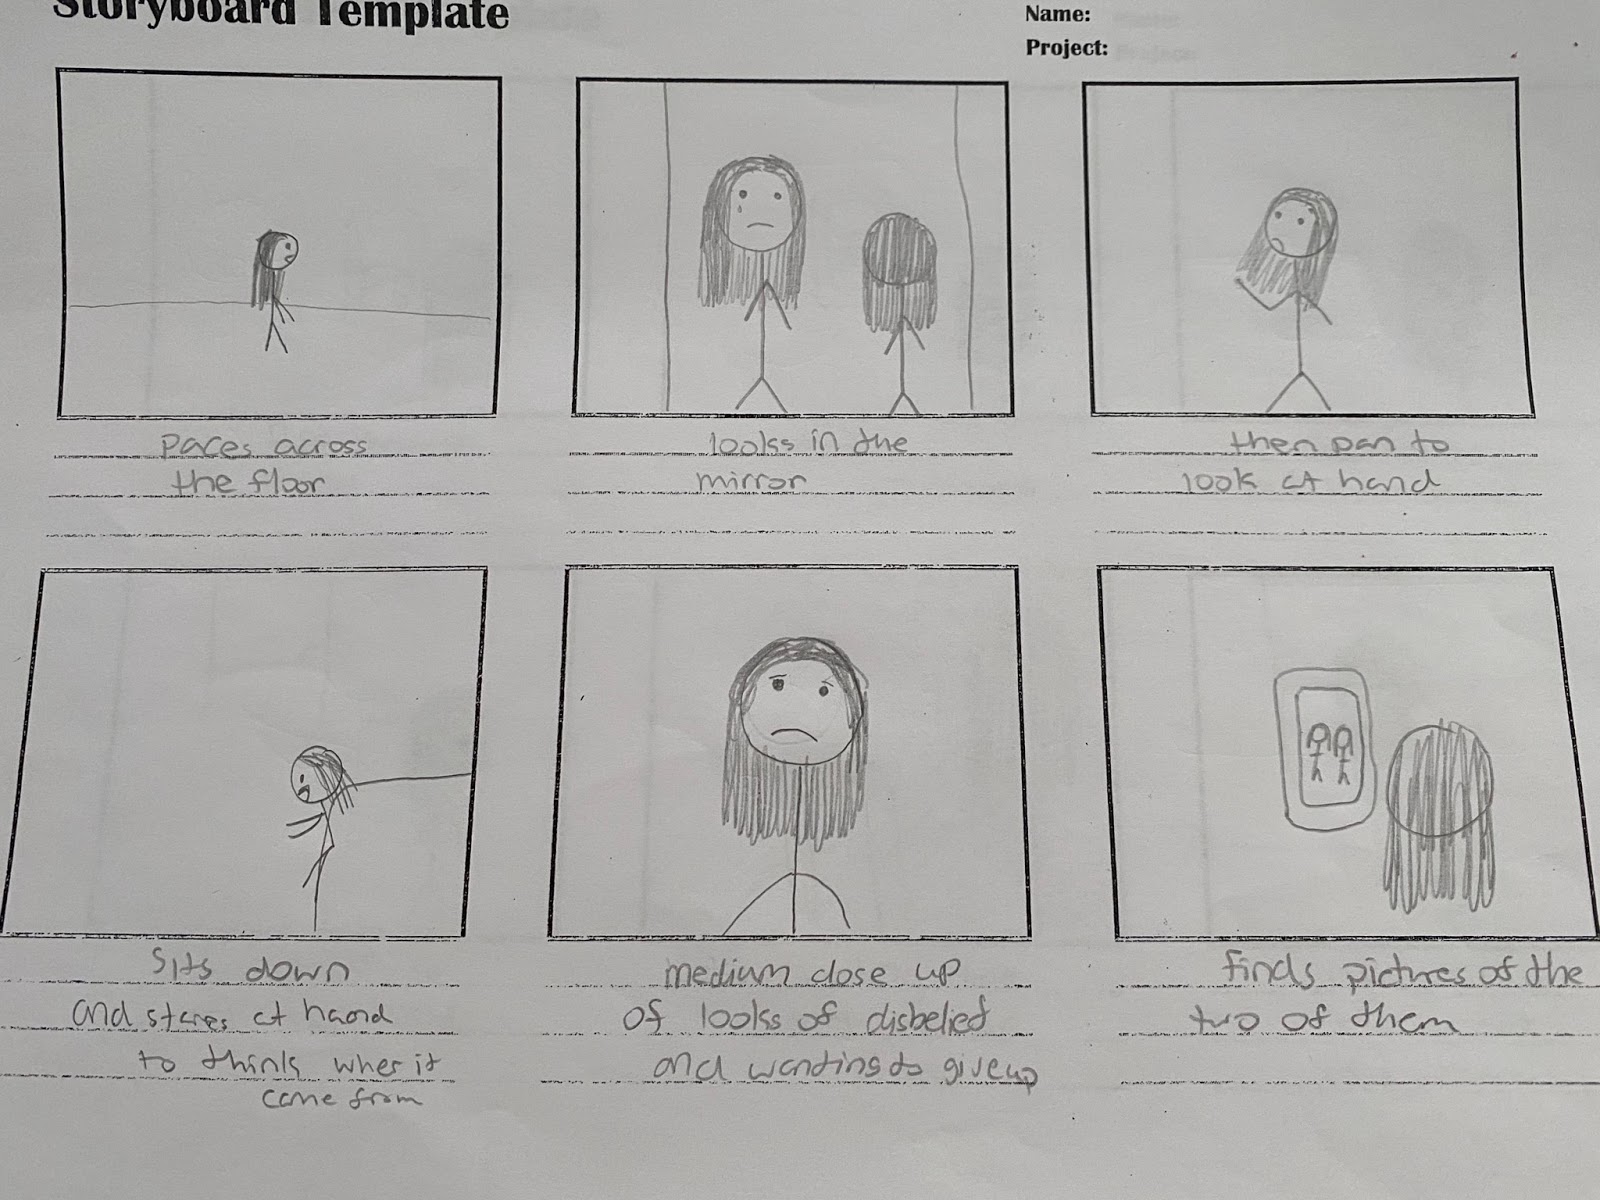
Storyboarding is drawing out your ideas. A short description with a detailed photo. This allows you to have an idea of what your filming when you start. This lets your ideas come onto paper and organize your thoughts. The more detailed the story is the better you have an understanding of whats going on. Scene by scene you plan what you'll be filming and what it will look like. Storyboarding is very useful and important to allow the filming stage to go smoothly. Since you have a background and a main visual of what you want to follow along. Our storyboard goes seconds by seconds and shows the emotions of the characters. With the descriptions explaining whats happening, the constant lighting, and camera angles and what type of shot.
Monday, February 10, 2020
Planning Blog:Titles
Now that we have an outline of our plans we can focus on our titles. Titles are important because they give credit. They are in the beginning two minutes and let the audience know things like the leading actors and directors. Titles can have a variety of styles. Along with how they get on the screen and how long. This adds to the creativity of our project. Because not only are we coming up with our own original ideas, but we get to have control of how it looks. As well as show our editing skills we've learned. Adding the titles with transitions will be using text and motion. We were also able to decide on corresponding colors to our theme but also visible when in the scene.
Planning Blog: Location, Health, Schedule
We will be giving an outline of our project. This will include our schedule and where we are filming. This part was relatively easy because we choose to film during the week due to our mostly open schedule. We also chose to all film at one house to make the location constant. For furthermore we aren't really doing stunts or gory film things so not many health concerns are involved. Our filming being in one location will allow the audience to get familiar with the setting. As well as having everything we need all in one house. For our participants, we don't really need extras. Our project is the focus of two girls. On how they react to an unfortunate situation they caused.
Thursday, February 6, 2020
Shooting Script
For our shooting script, we explain many things. One will be what camera angles we use. What type of shots we plan to get. A basic outline of the lighting. And movements. We list in bullet points about what angle or shot will be. And continue it into what it will move into or be edited into. One thing kept constant was the lighting. However, we are still working on character names so those are working in place. Our script gives the basics of what we want to shoot and how it'll look.
Sound And Dialogue Script
In this script, we will be explaining the sounds of our project. This will explain our project but only in sound. Some would include dialogue and diegetic sounds. This script allows us to plan the dialogue for both characters. As well as what sound we need to consider. Things like background music and non-diegetic sounds need to be thought of and in place before filming. These will require permission or need other items to create the effect of the sound. Sound can add a lot to the scene and create a dramatic effect. This will enhance our scenes. And will help "blend" them together.
Subscribe to:
Posts (Atom)
